


This story was originally published by Outdoor Life.
Knot tying has always been one of those key outdoor skills that the inexperienced take for granted. The experienced outdoorsman, however, has had enough success and failure to know that there are right and wrong knots for certain jobs.
But first, it helps to know a few strange terms. Put it simply, a knot is some kind of fastening or splice made by intertwining one or more ropes or some other flexible material. After tightening a knot, it should hold on its own. A hitch is a little bit different. It’s like a knot, but it generally involves another object like a stick, a post, a ring, or occasionally another rope. Properly tied, hitches can hold their place, or they may be able to slide, depending on the hitch you choose. A lashing is like a hitch, but slightly more complex. Lashings involve the use of a rope or similar material to secure two or more objects together. To grossly oversimplify all this, the knot is just rope fastened together; the hitch is a rope fastened to an object; and a lashing is a rope fastening multiple objects together.
A good knot can save lives when you’re dealing with a survival situation, performing first aid, and when working over heights or water. But, you have to know how to tie it. So make sure you know what to do with your rope the next time you head into the wild by learning these 20 essential knots.
1. Square knot
The square knot is a classic for connecting lines and tying knots. Whether you are tying two ropes together to make a longer rope, or you are tying up a bundle of firewood to carry, the square knot is a winner. It’s much more secure and stable than its cousin the granny knot, which everyone is probably familiar with as part of tying their shoes.
How to tie a square knot:
You can tie a solid square knot by lapping one rope right over left, then underneath the other, and then tying the same again in the reverse direction—left over right and then underneath. You’ll know you did it right when the working end and standing end of each rope is side by side (not making a “cross” like a granny knot).
2. Clove hitch

The clove hitch is an easy knot to tie, and it secures a line to a tree or post quickly, but it does slip when used alone, without any other knots as a backup.
How to tie a clove hitch:
To create a clove hitch on a tree, make a loop of rope around the tree. Then make another loop and pass the free end of the rope under the second loop before tightening. To tie this one over a post or stake, just create a loop in the free end of the rope and slide it over the post. Then make another loop the same as the first. Put the second loop over the post (just above the first loop) and tighten the hitch.
3. The bowline
The bowline creates a loop at the end of a rope that cannot shrink or expand. This knot is often taught and illustrated with a poem of a rabbit coming out of the hole, hopping in front of a tree, going behind the tree, and back down his original hole.
How to tie a bowline:
Form a loop on top of the long end of the line. Pass the working end of the line up through the loop and around behind the line. Then pass the working end down through the original loop, all while maintaining the shape of the second loop you create, which becomes your bowline loop. Once the “rabbit” is back down its hole, pull the “tree” up to tighten the bowline.
4. The figure eight
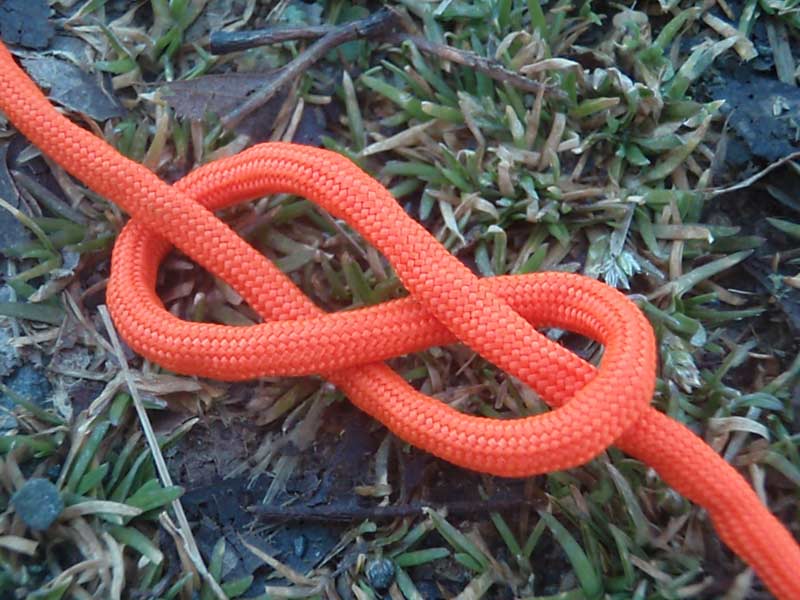
The figure eight knot creates a stopper wherever you need one on a rope, though the steps are also steps you take to create several other knots.
How to tie a figure eight:
To tie a figure eight, also known as a Flemish bend, simply pass the free end of a line over itself to form a loop. Continue under and around the line, and finish the knot by passing the working end down through the original loop.
5. The sheet bend

The sheet bend is my favorite one of all, even though technically it’s a “bend”—a type of knot that connects one rope to another. I like it because it’s the best bend for tying different types of material together or joining different thicknesses of rope. This knot even joins together lines or materials that normally couldn’t be joined together because of differences in diameter.
How to tie a sheet bend:
To create a sheet bend, bend the thicker or more slippery rope into a “J” shape (like a fish hook). Then pass the other rope through the hook shape from behind, wrap it around the entire fishhook once and then tuck the smaller line between itself and the other rope. If the ropes are the same diameter and texture, the sheet bend actually resembles a square knot. To tie a sheet bend with fabric or a tarp, collect, squeeze, and shape the material into a “J” shape, and then run your rope through and around the “J.”
6. Two half hitches

You can use two half hitches to secure a line to trees or poles, or to secure the line to itself like you would tying a trucker’s hitch. A half hitch is fairly easy to tie, and I use it often to tie tarps up for shelters, or to hang up hammocks.
How to tie two half hitches:
After you wrap the rope around the standing end and through the inside of the loop created to make the first half hitch, wrap around the line the same way again to make the second half hitch. Pull it tight and you should have two half hitches, one seated next to the other. If you want added insurance, you can tie an overhand knot with the tag end of the line to keep the two half hitches from slipping.
7. Taut line hitch
The taut line hitch takes the place of a slide to tighten or loosen a loop in a line (like a tent guy line). This knot grips well as long as there is tension on the “taut” side of the loop.
How to tie a taut line hitch:
To tie the taut line hitch, create a loop by wrapping around a solid, unmoving object like a tree or tent stake. With the free end of the rope, wrap around the main line twice on the inside of the loop. Then lay the free end of the rope over the two wraps, wrap it around the main line, and draw the tag end through the loop you just created. Cinch the wraps until tight. Pull on the standing line and the taut line hitch should grip the loaded line.
8. Fisherman’s knot

True to its name, the fisherman’s knot is pretty much only good for using with fishing line.
How to tie a fisherman’s knot:
Pass the free end of the line through or around the object to be secured, for example, through the eye of a fishhook. Then, wrap the free end of the line around the other side of the line about five or six times. Pass the free end of the line through the triangular opening next to the object being secured, and then pass the free end of the line through the large loop you just created by going through the small triangle. If you are tying this one with fishing line, spit on the line before tightening to lubricate it so that the friction does not cause heat damage to the line. Tighten the knot, trim off any extra line and enjoy your day fishing.
9. Water knot
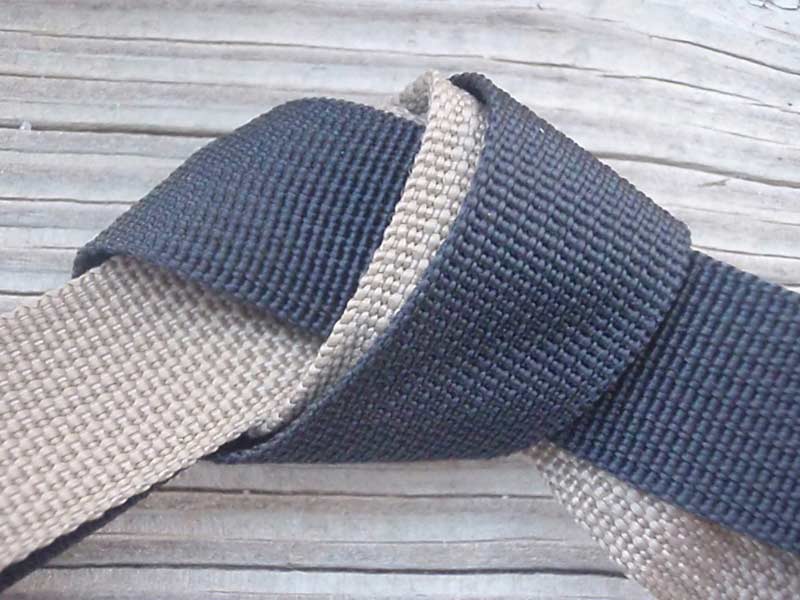
The water knot safely secures webbing, flat belts, and most types of straps together.
How to tie a water knot:
To tie the water knot, start with a loose overhand knot in the end of one strap. Pass the other strap in the opposite direction so it mirrors the route of the overhand knot on the first strap. Take the ends of the two straps and pull the knot tight. That’s it—it’s very simple and very strong.
10. Rolling hitch
The rolling hitch adds a leg to an existing line. This hitch is the basic knot behind a taut line hitch, but it can be added to any existing line. The rolling hitch was often used historically to hook more dogs to a dog sled main line.
How to tie a rolling hitch:
Wrap the free end of one rope around the main rope to create a half hitch. Make a second half hitch and then wrap over the entire knot to finish with a final half hitch to the other side from your starting place.
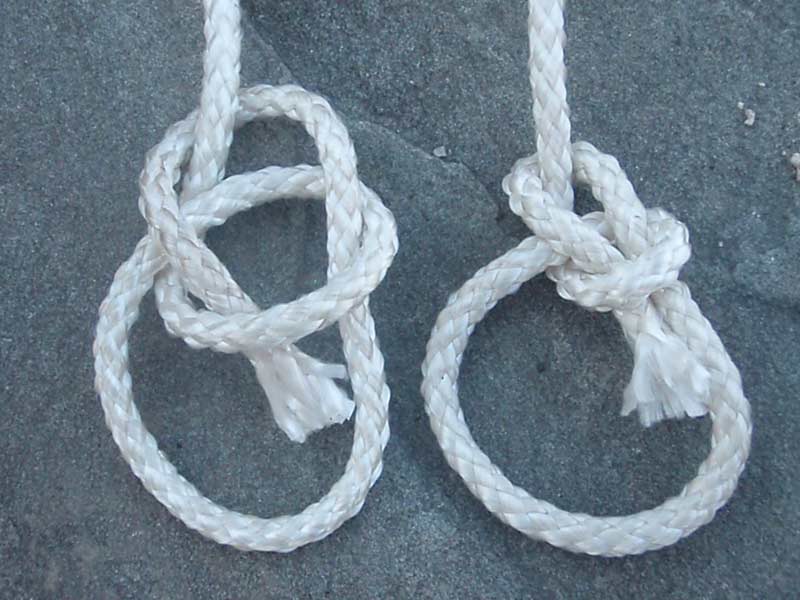
11. Prusik knot
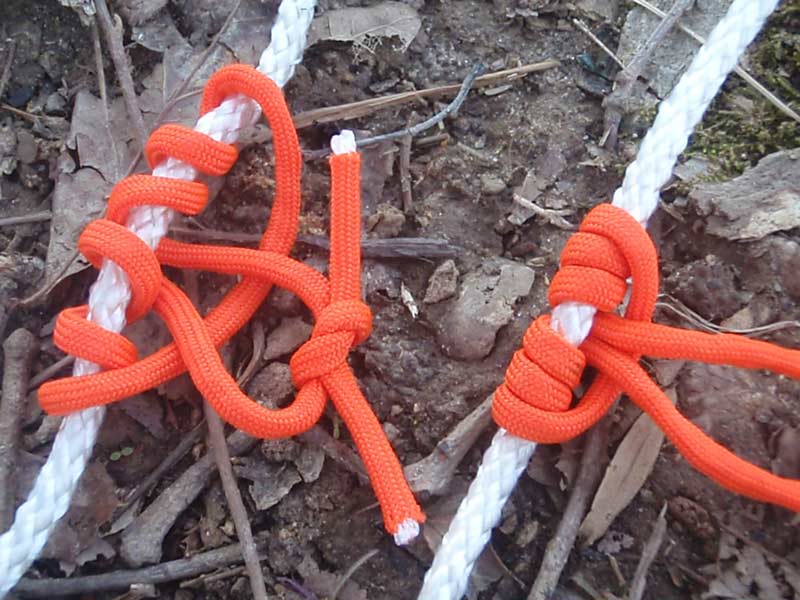
The Prusik knot creates a loop that can be used as an ascender or decender. This “slide and grip” knot can also be handy for adding a loop to a rope when neither end of the rope is free.
How to tie a Prusik knot
To tie a Prusik, you’ll need a short rope and a separate long rope. Tie a loop in the short rope that is secured with a solid knot like a square knot. Now, wrap the loop around the long rope three times, making certain that each wrap lies flat against the long rope. Pass the loop of short rope under itself and pull it tight. As long as there is weight on the loop, the Prusik will grip the long rope. You can also slide the Prusik up or down the long rope by taking the weight off the loop and pushing the wraps up or down the long rope.
12. Timber hitch
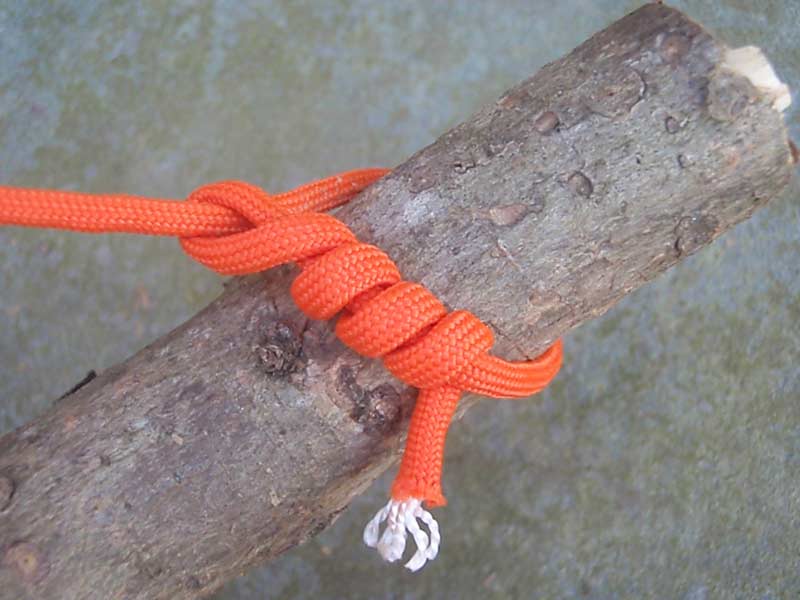
The timber hitch secures a rope to an object for hauling or to act as a support.
How to tie a timber hitch:
To create a timber hitch, all you need to do is run the free end of the rope around the object, like a log, that you intend to pull. Then wrap the tag end of the rope around the inside of the loop you created four or five times. After you tighten the timber hitch so the four or five wraps are tight against the object, the constant tension will keep the hitch seated.
13. Blood knot
This little gem of a knot is used on fishing line to secure two lines together (mends a broken line or attaches leaders and tippets).
How to tie a blood knot:
You’ll start the blood knot by overlapping the two lines, and wrapping one free end around the other line five or six times. Pass the free end between the two lines. Wrap the other line the same number of times (five or six), and tuck the free end back between the two lines in the opposite direction of the other free end of the line. If using fishing line, spit on it to reduce friction damage.
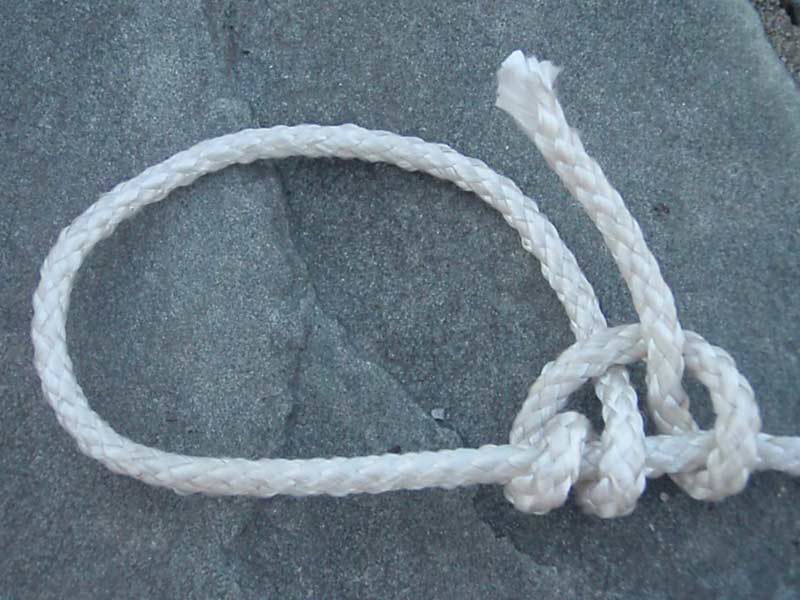
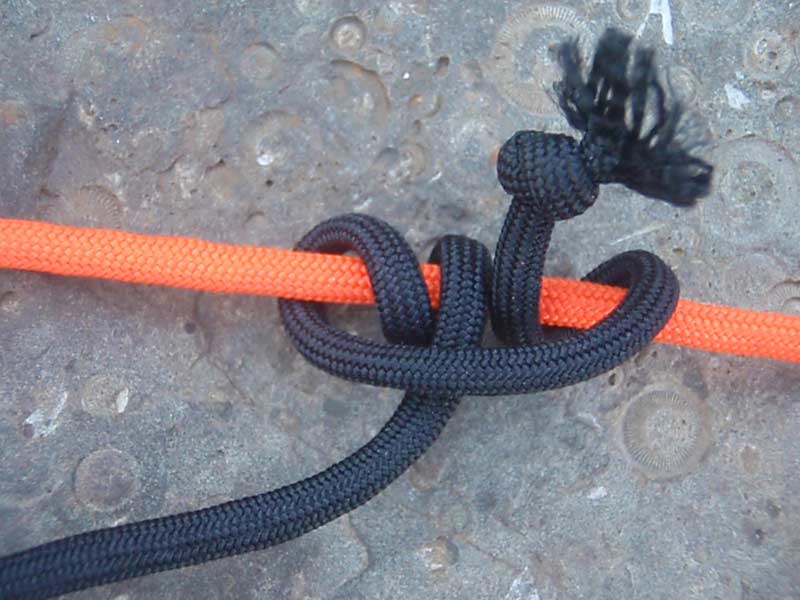
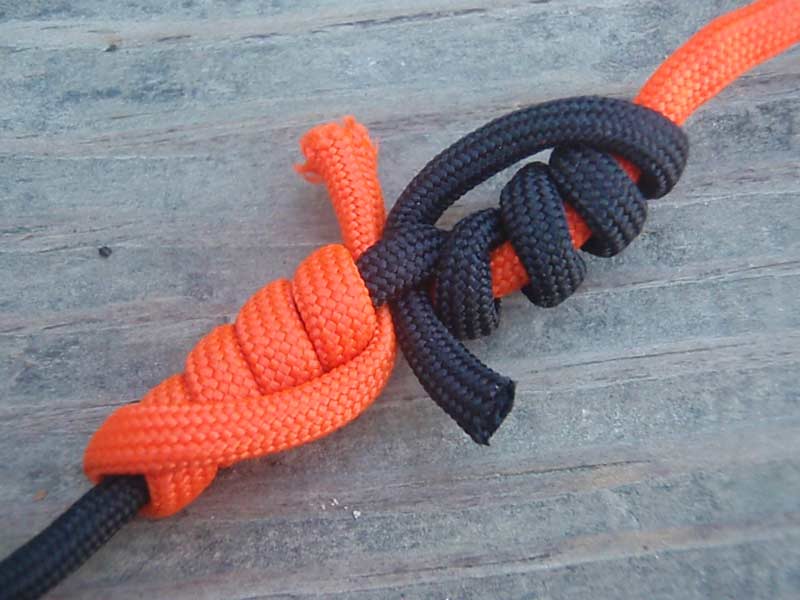
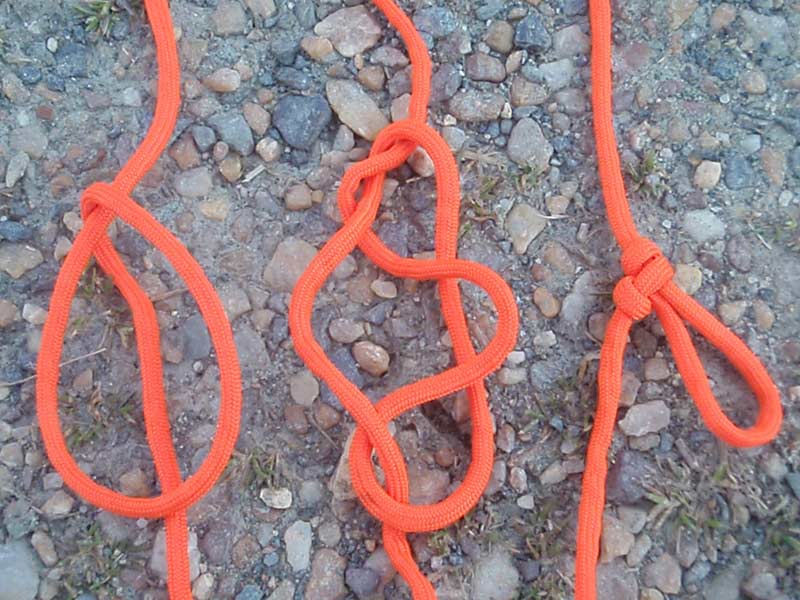
14. Man harness
This crafty knot allows you to put a loop in a line anywhere along the length of a rope when neither end of the line is free to tie a loop—and you didn’t hear it from me, but a man harness is great for cheating at tug of war.
How to tie a man harness:
Gather some slack in the line and make a loop so part of the line runs through the middle of the loop. Grab the side of the loop and pull it through the gap between the line in the middle and the other side of the loop. Pull the new loop tight, and then pull the line to cinch the man harness knot. This knot can slip if there isn’t constant tension on the newly created loop, so keep something in the loop to hold it.
15. Carrick bend
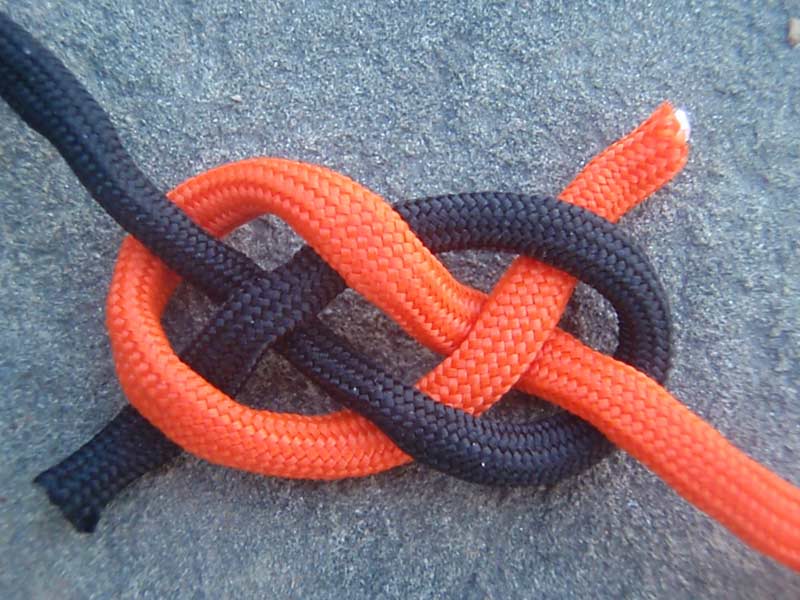
This square knot alternate joins two ropes together securely, and is easier to untie than a square knot.
How to tie a carrick bend:
To tie the carrick bend, form a loop with the free end of one rope. Pass the other rope’s free end under the first loop, and then over then under as seen in the picture. Thread the free end across the loop passing under itself, and pull on both standing ends to tighten.
16. Trucker’s hitch
You don’t have to be a truck driver to have a use for this rugged hitch. The unique feature of the trucker’s hitch is it gives you a unique mechanical advantage for tightening up a line. While tying this hitch is a little complex, it’s worth the trouble if you need to tighten lines as much as possible before securing them—I use it all the time to tie down tarps or secure shifting payloads.
How to tie a trucker’s hitch:
Start off by tying a figure eight knot with a loop of the line. Then pass the free end of the line around or through whatever you’re attaching the rope to, before passing the line through the loop. Next, pull the working end tight, and secure the free end with two half hitches, just below the loop.
17. Barrel hitch
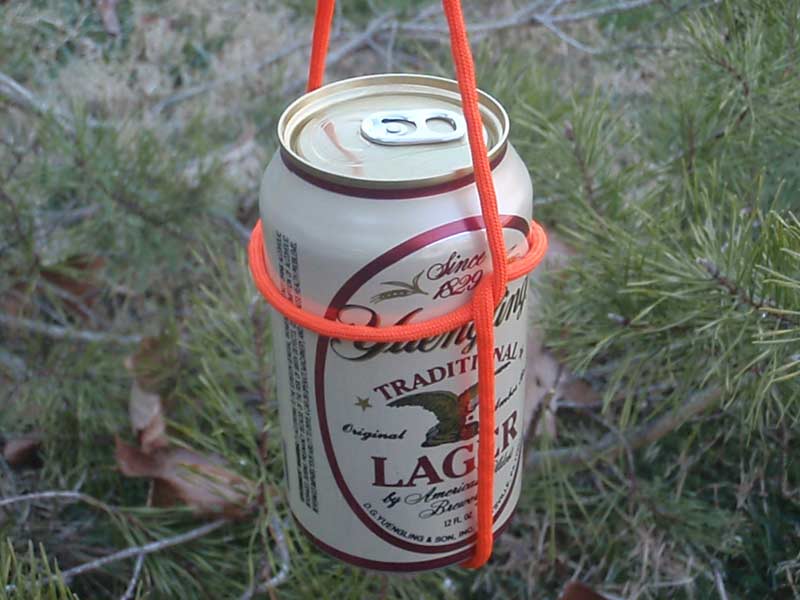
The barrel hitch has been used in sailing and construction work for centuries. It allows you to secure a bucket, barrel or other cylindrical object to lift it in a well-balanced position.
How to tie a barrel hitch:
Place your barrel or other object to be lifted on top of your rope. Then tie an overhand knot across the top of the barrel. Open up the overhand knot until it wraps around the top sides of the barrel. Tie the ends of the rope together with a square knot and then then lift. This knot makes a fine bucket handle when the wire handle finally breaks off.
Safety warning: For safety and stability while hoisting barrels, the rope around the barrel needs to be high above the center of gravity on the barrel, but pose no danger of slipping off the top of the barrel. FYI, beer has an excellent center of gravity.
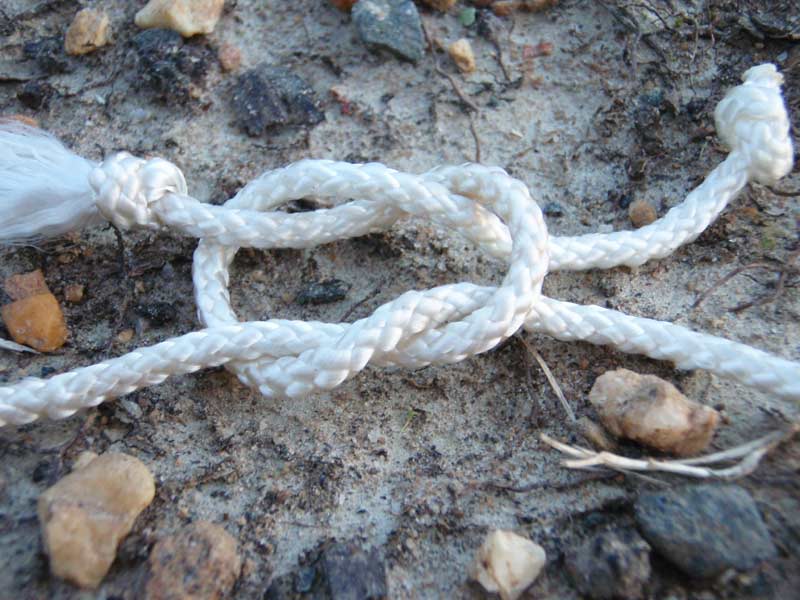
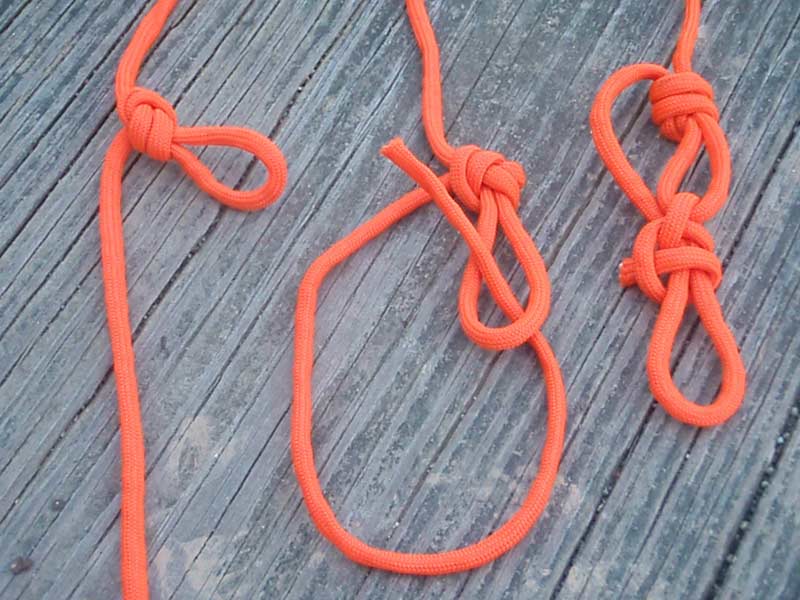
18. Sheepshank
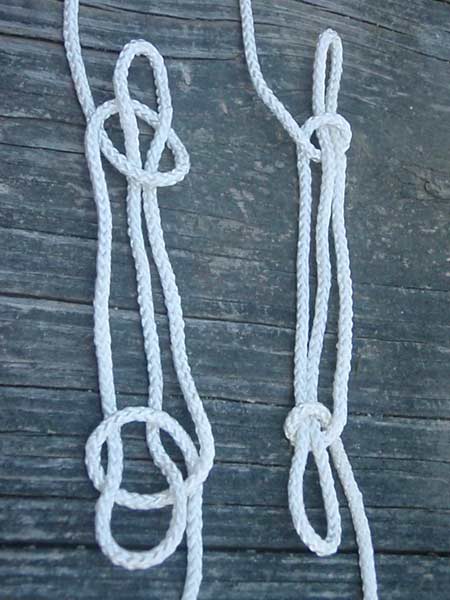
This knot seems half magic trick, half practical knot, but it shortens a line without cutting the line. This knot keeps our long ropes in one piece, despite our miscalculations in the field. I will use this one on bear bags, when the line is too long, but I don’t want to cut it.
How to tie a sheepshank:
To tie a sheepshank, fold the rope to the new length you need. Create a half hitch in one end of the continuing rope, and drop it over the nearby loop. Make a half hitch in the other standing end, drop it over its adjacent loop, and then tighten the whole thing slowly.
19. Tripod lashing

The tripod lashing is commonly used for shelters and to support camp items, like a cooking pot over a fire.
How to tie a tripod lashing:
Start by collecting three poles that of almost identical length and thickness and lay them on the ground side-by-side. Tie a clove hitch to one of the end poles, and then wrap around all of the poles four, five, or six times. Now, wrap line between the poles–twice between each one–working back toward the original knot or hitch you tied. Finish the lashing by tying the tag end of the line to the tag end of your original knot. Spread the legs of the tripod and use it in your camp for something handy.
20. Square lashing
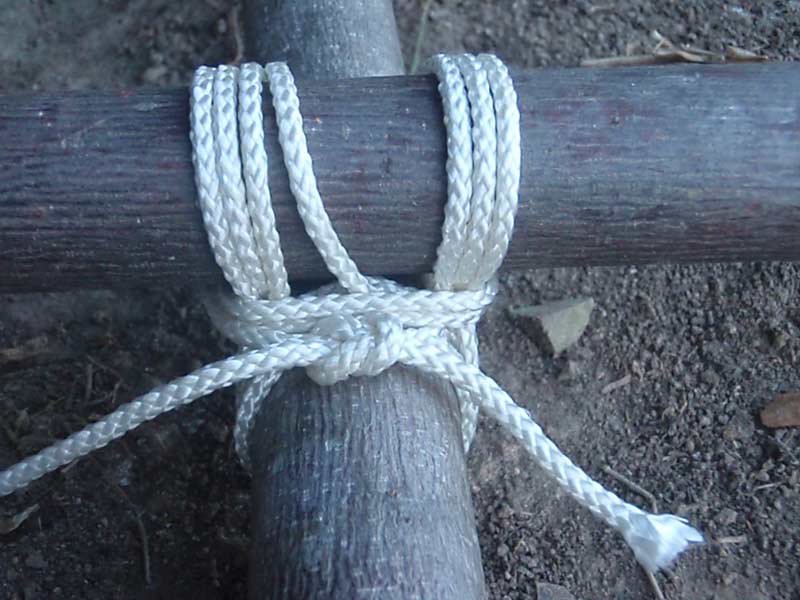
The square lashing has been used to build everything from camp chairs to towers and bridges – but you can also use it to secure two poles together.
How to tie a square lashing:
Tie a clove hitch to one of the poles, near the place where the two poles cross. Then wrap your line around the junction of the two poles, going under the lower pole and over the top pole. Spiral outward with these wraps five or six times. Next, wrap between the poles, biting onto the previous wrappings to tighten them. Finally, use a square snot to tie the free end of the rope to the free end from the clove hitch that started this whole lashing. Easy, right?


