


Today, we take for granted the instruments that let us look at tiny things in great detail. But back in the 18th century, the microscope was the hottest party trick in town.
Back in those days, English intellectuals would throw friendly social gatherings known as science parties. In genteel homes, over coffee and tea, men and women would engage in science discourse and see demonstrations of the latest findings and ideas.
For example, the great chemist Humphry Davy—who eventually discovered numerous elements including sodium, potassium, calcium, and magnesium—would hold rambunctious gatherings where participants would take turns inhaling nitrous oxide, better known today as laughing gas, with predictably intoxicating results.
Most science parties were a bit more sedate than Davy’s. Often, they involved the identification of local plants or scanning the dark skies for meteors and comets. Another popular pastime was building and using high-voltage electrostatic devices such as Wimshurst machines and Leyden jars.
But perhaps the queen of science parties was the solar microscope. First developed around 1750, solar microscopes became increasingly popular during the decades that followed. The instruments worked much like 1970s vintage slide projectors. However, for illumination, instead of using the not-yet-invented lightbulb, solar microscopes relied on a moveable mirror and lens system to reflect sunlight. The device then projected a much larger image of the microscopic specimen onto the wall of a darkened room.
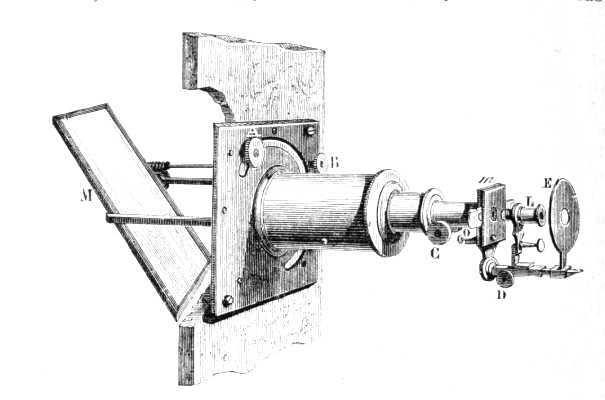
A 19th-century solar microscope
While at one time fairly popular, solar microscopes are now mostly forgotten, and their legacy among the few science historians who study them is a bit mixed. Some view the instrument as a toy without much of a scientific legacy, a device strictly for amateurs and tinkerers. Others argue that the devices were important, sparking interest in science by offering images of previously unseen things. They showed people that the microscopic world was both interesting and important, forcing them to expand their imaginations.
Once I learned about the history and science of this wonderful little instrument, I decided to build one myself. I couldn’t easily find a great deal of information on constructing solar microscopes, but through trial and error—and reading the limited material I obtained—I came up with a DIY device that works pretty well. Plus, with the addition of a few modern twists, I made my version much easier to assemble and use.
When I placed prepared slides of plant cells and insect parts inside the solar microscope, they appeared just as the Enlightenment-era science partygoers had claimed. Although I have looked at tiny objects in a regular optical microscope before, seeing the images big and bold, projected by a machine of my own making, was immensely satisfying.
I think of this instrument as a bridge between the macroscopic and the microscopic. Because the sun acts as the light source, the solar microscope combines opposites: The tiny becomes the huge, and the very dark becomes the somewhat bright. And most strangely, astronomy becomes biology.
Build the solar microscope
Crafting a solar microscope is not particularly difficult, but it does require the use of a few woodworking tools. Depending on your ability to find used parts at reasonable prices, the cost should be less than $50.
Stats
- Time: About 16 hours
- Cost: About $50
- Difficulty: Medium
Tools
- Electric drill with 1/8-inch, 5/32-inch, and 5/16-inch bits
- Wood chisel
- Wood glue
- Glue
- Three wood glue clamps
- Sandpaper, cut into a 1-inch-wide strip
- Hole saw, 1¾ inches in diameter
- Hammer
- Utility knife
- If you do not rely on solar power: High-intensity flashlight
- If you rely on solar power: Paint-safe tape
Materials
The precise size of your solar microscope will depend on the projection lens you select. These plans are based on a Kodak Ecktanar projection lens of 102 mm and f 2.8, which is slightly over 2 inches thick at its widest point. This lens is very common, and you can find used versions for fairly cheap prices on websites like eBay. If you end up with a different lens, then it’s important to realize that the dimensions of the box will change. The diameter of the lens will affect the width of the wood boards, and its focal length will affect their length.
- Two basswood or poplar wood boards, 2¼ inches wide by 13 inches long by ¼ inches thick (You can easily cut basswood or poplar to size on a bandsaw. If a bandsaw is not available, you can use a handsaw as long as you’re careful.)
- Two basswood or poplar wood boards, 3 inches wide by 13 inches long by ¼ inches thick
- Eight ¼-inch diameter t-nuts (T-nuts are available at any hardware store and provide a way inserting a bolt onto a flat wood surface. Each one consists of a screw-threaded body with a flange at the top, so it resembles a T when you view it in profile.)
- Projection lens from a slide projector, such as a Kodak Ecktanar 102-mm lens
- Four ¼-inch thumbscrews, ½ inch long
- Four ¼ inch thumbscrews, 1 inch long
- Two #10 bolts, 2 inches long, with nuts and washers for each
- Two wood squares, 2-and-3/16-inches by 2-and-7/16-inches by ¾-inch-thick
- One wood square, 2-and-3/16-inches by 2-and-7/16-inches by ¼-inch-thick
- Two plano-convex condenser lenses, 50 mm in diameter (At the time of this writing, Amazon, Aliexpress, and eBay all sell such lenses for less than $10. If you cannot find appropriate lenses, substitute a double convex lens (such as the lens from a small magnifying glass) for the two plano convex lenses for a similar result with only a small decrease in image brightness.)
- If you rely on solar power: Round mirror, 2½ inches in diameter
- If you rely on solar power: Magnifying glass mounted on a universal joint (This is the type of joint you see on a magnifier attached to a soldering station, or “helping hand.”)
- If you rely on solar power: Opaque black cloth
Instructions
The solar microscope consists of four parts: a projection lens, a box to hold the components in the correct positions, a condenser lens, and a solar reflector or a high-intensity flashlight. The latter option will depend whether or not you decide to harness the sun as your light source.
Sunlight can be an unreliable and finicky source of illumination, so I recommend that you first try this project with a flashlight. If that works, then you can purchase the parts for your solar reflector, build it, and attach it to the completed microscope.
Buy the projection lens
While it is possible to construct a projection lens from single lenses, it is much easier and cheaper to simply buy a used projector lens. Slide projectors were very popular from the 1960s through the 1990s, and most now sit unused in basements and attics. This means it’s not difficult to find a good-quality slide projector lens at nearly giveaway prices.
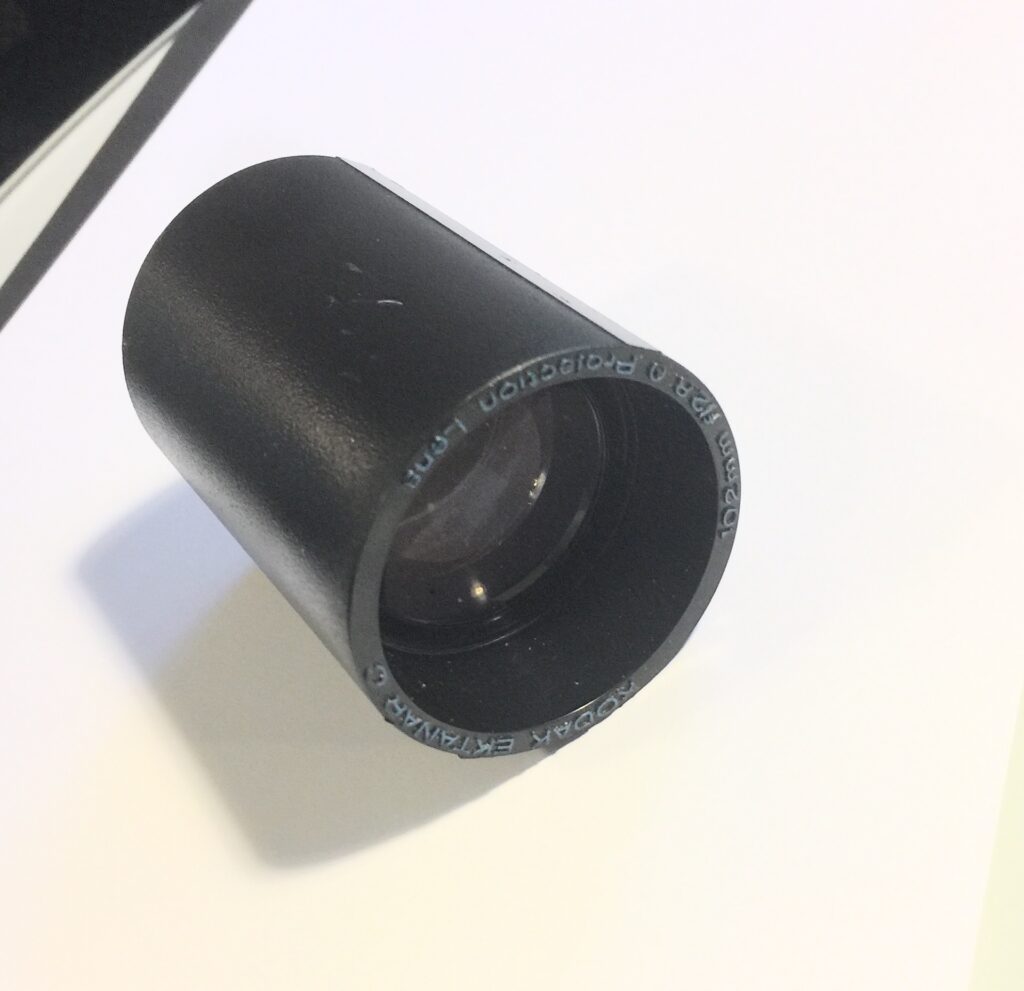
Projection lens
Measure the diameter of projection lens prior to making the box to make certain it will fit inside. If the lens is too big, increase the size of the box by using wider pieces of wood.
Construct the box
To hold all the components together, you’ll need to construct a wooden box that can accommodate them.
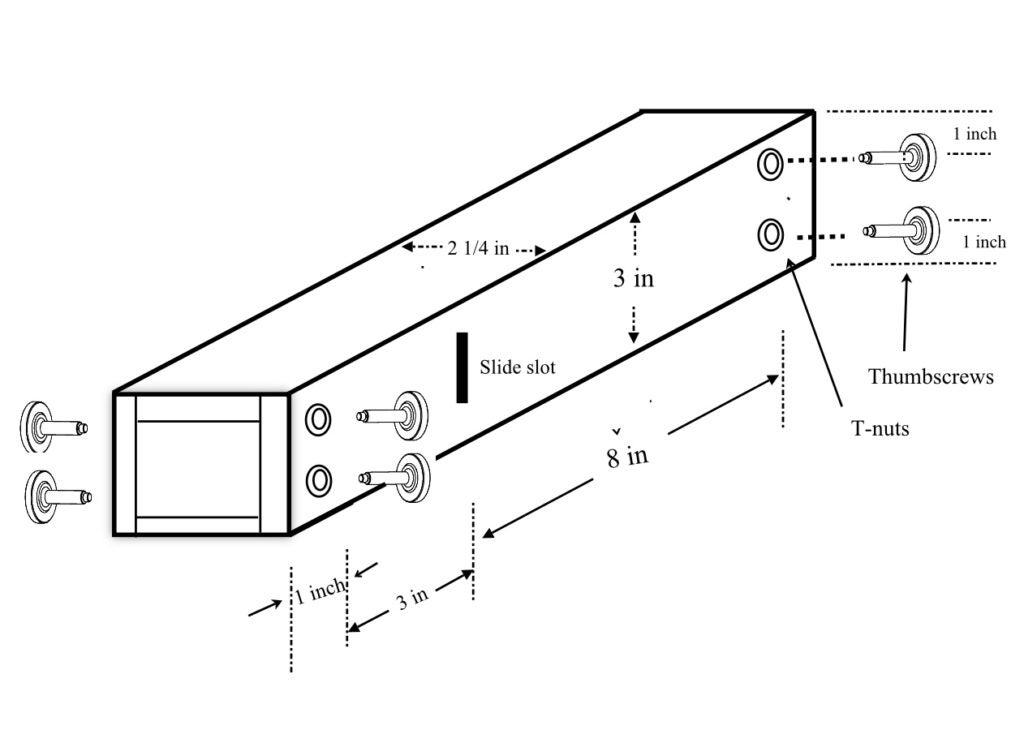
Box assembly
First, you’ll need to create a slot in the 3-inch-wide boards, forming an opening for a specimen slide. To make that cut, you’ll need the electric drill with 1/8-inch bit, chisel, and sandpaper strip.
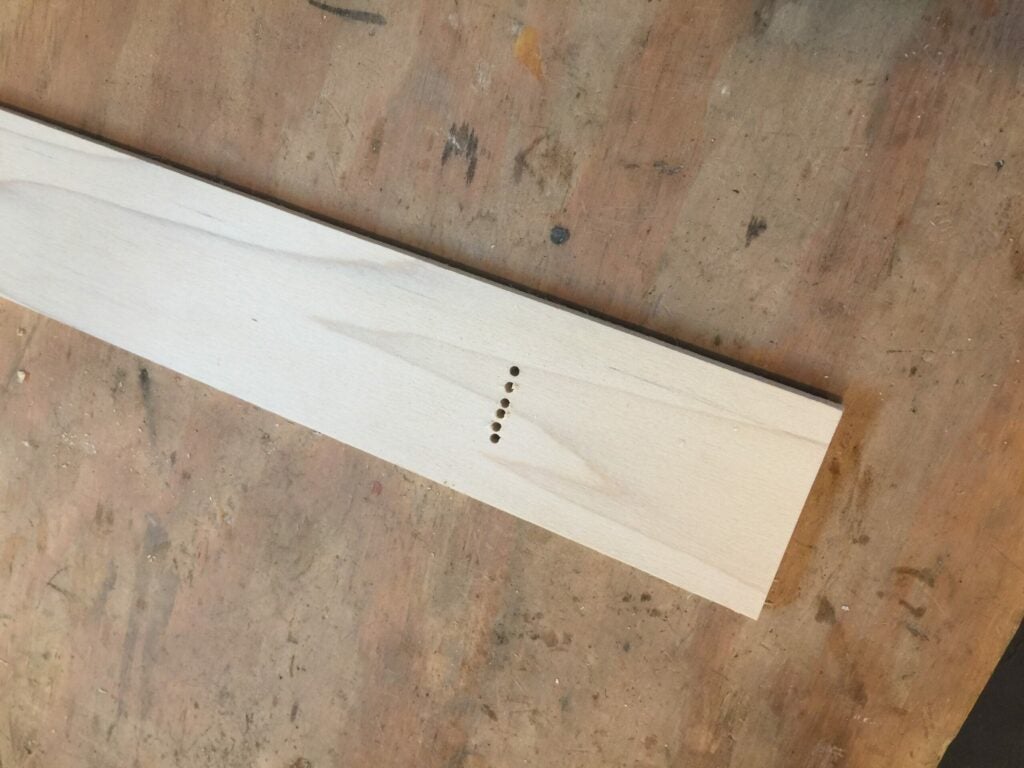
Holes for slot
Begin by drilling a series of holes so they form a line that’s 1-and-1/8-inches long. Then clear out the wood between the holes with the chisel. The result will be jagged, so smooth it out: Thread the 1-inch-wide strip of sandpaper through the opening and sand away the rough bits.
Next, drill four 5/16-inch holes in each 3-inch-wide board, placing them as shown in the box-assembly illustration. Place the t-nuts over the holes and hammer them home.
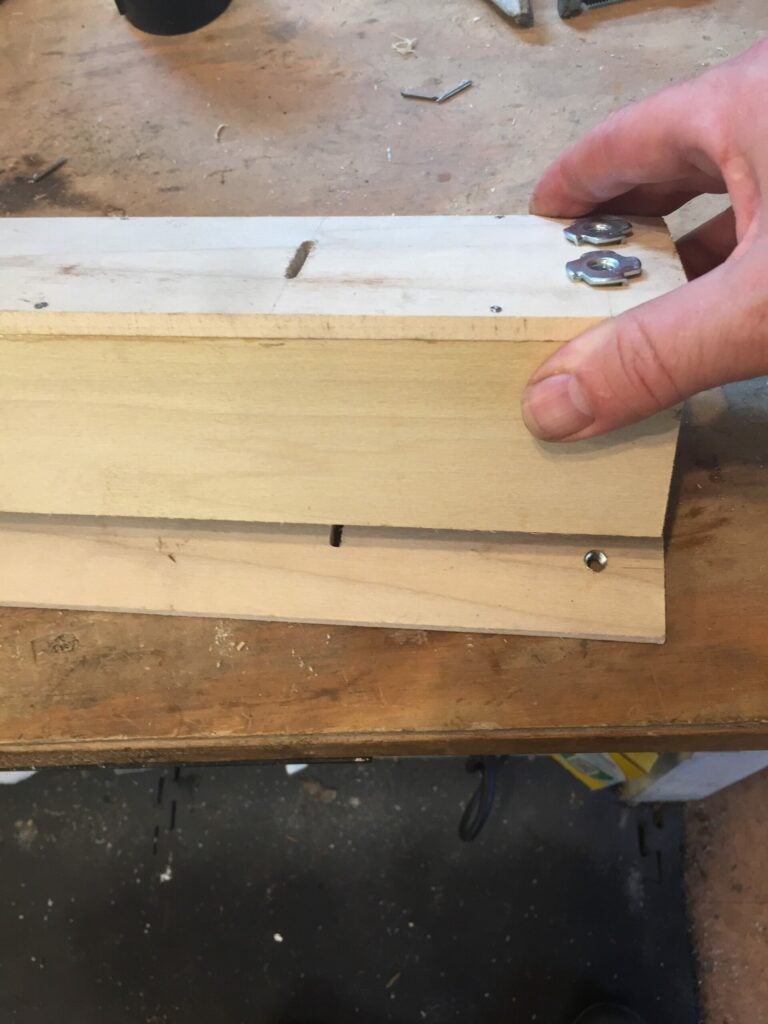
Assembling the box
Now that you’ve prepared the 3-inch-wide boards, you can fit them to the 2¼-inch-wide boards to assemble the box.
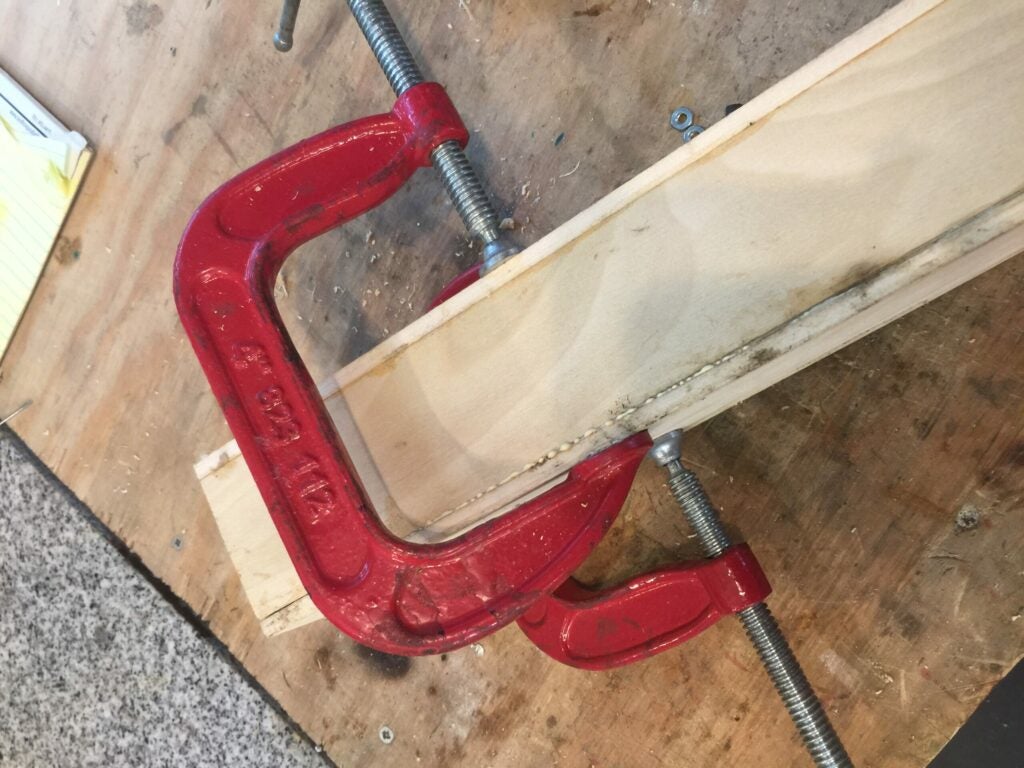
Gluing the boards together
Spread glue on the edges of the of the 3-inch-wide boards and press them against the 2¼-inch-wide boards. Then clamp the assembly in place while the glue dries, which should take about an hour.
After you remove the clamps, insert the thumbscrews. The 1-inch-long ones should go into the t-nuts nearest the slot, and the ½-inch-long ones into the t-nuts at the other end.
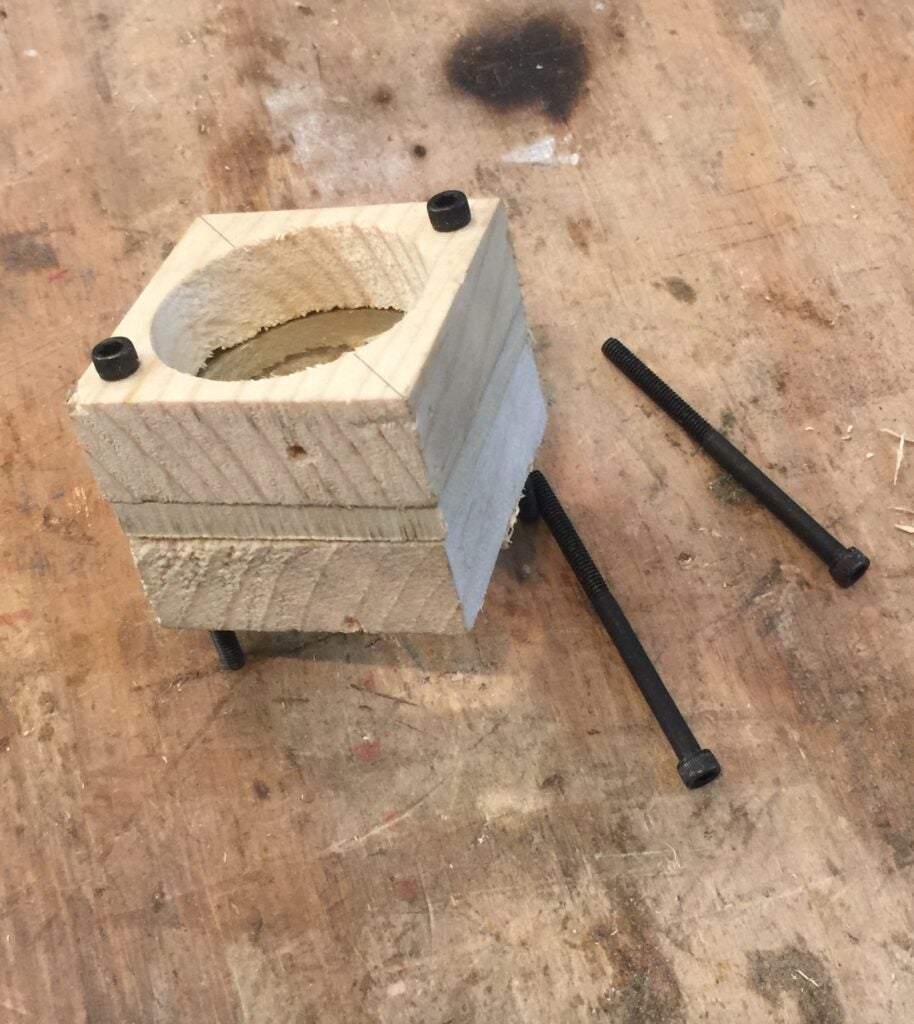
Make the condenser lens
In order to form a bright image, the sunlight from the reflecting mirror or flashlight must be focused, or condensed, onto the image which is to be projected. A condenser lens typically consists of two plano-convex lenses slightly separated and arranged in the following assembly.
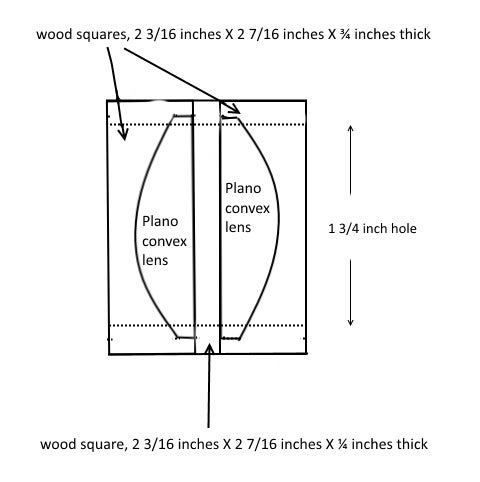
Condenser lens
To make the condenser lens, first find and mark the center of each wood square. Drill a 1¾-inch hole, centered on the mark you just made, in each of the three pieces.
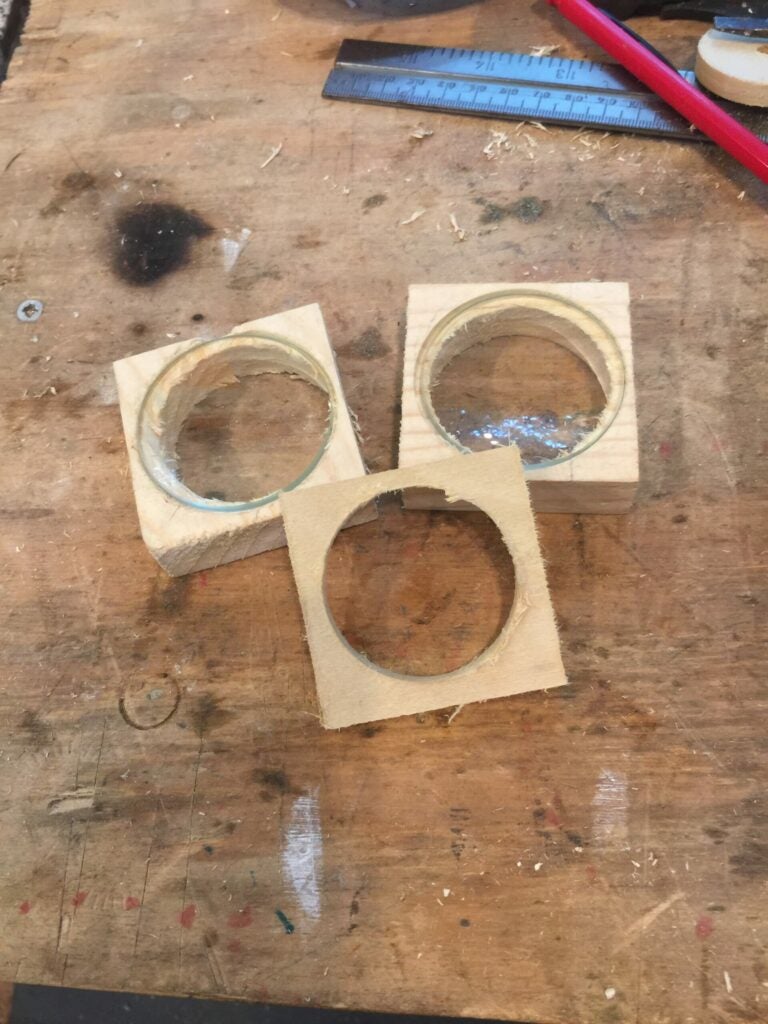
Carved squares
Next, for the two ¾-inch-thick squares, use the utility knife to carve a lip onto one side of the drilled hole. The carving must be deep enough to prevent each lens from projecting above the plane of the wood surface.
Stack the three condenser lens pieces one atop the other and then drill two 5/32-inch holes through opposite corners of the assembly.
Assembled condenser lens
Place the lenses inside the holders, as shown in the condenser lens diagram. Then insert the #10 bolts through the holes. Insert washers and tighten the nuts.
Place the assembly inside the wooden box, making sure it slides in smoothly. If the condenser lens catches or binds at any point, sand away some material from the wooden lens holder until it moves easily.
Cobble together the solar reflector
If you decide to power your microscope with sunlight, you’ll need to direct these rays to the condenser lens and then through the slide specimen. This requires a solar reflector. To make it easy to attach my reflector to my microscope, I fashioned one out of a magnifying glass with a universal joint.
You can make an inexpensive solar reflector by cannibalizing a so-called “helping hand” or “third hand,” a device used to hold pieces in place when you’re soldering electrical connections. These inexpensive contraptions (they cost about $5 at tool store Harbor Freight) usually include a small magnifying glass that ends in a universal joint.
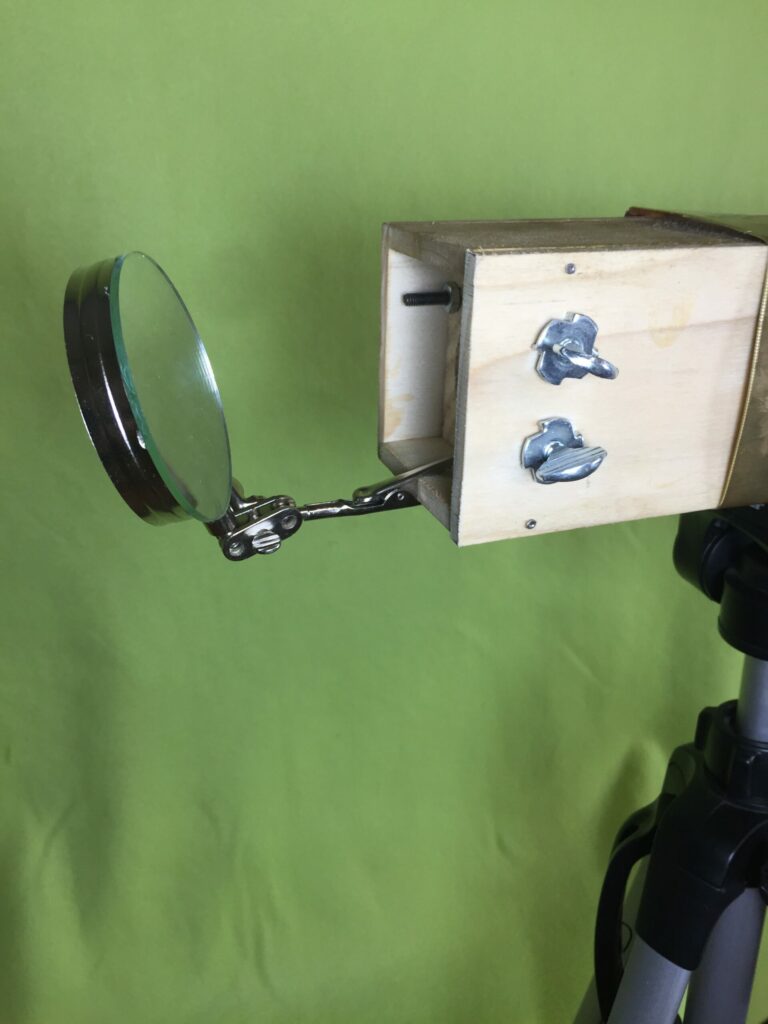
Solar reflector
Remove the magnifier lens and glue a small mirror to its lens, as shown in the image above.
Now you can attach the solar reflector to your project. The universal joint lets you quickly adjust the angle to better reflect light into the solar microscope.
Assemble the pieces
Once the component pieces are finished, you can assemble them into the solar microscope.
Begin by inserting the projection lens into the box, at the end closest to the slide-holder slot. Gently tighten the thumbscrews to lock the projection lens in place, making sure the light can move through the lens in a line perpendicular to the open faces of the box.
Insert the condenser lens into the other side of the box. Tighten the thumbscrews.
Use the microscope
Take the solar microscope into a darkened room and point the projection lens at a white wall or screen located about 10 feet away. Insert a slide with a specimen into the slot and center it. Now, shine a flashlight (the brighter the better) into the condenser end of the box. Align the lenses and the specimen slide so the light is centered and travels perpendicularly to the surfaces of the lenses and slide.
You may need to adjust the position of either the projection lens or condenser lens to achieve a sharp focus. To do so, loosen the thumbscrews and ease the lens and lens holders back and forth until the image appears sharp and focused.
Depending on the focal length of the lens and the distance between the projection lens and the screen, you can expect a magnification of at least 25. You can increase the magnification to 50x and beyond by moving the solar microscope farther from the screen. Just be aware that doing so makes the image dimmer as well.
If you don’t mind using a flashlight or other artificial light source, then you’re all set. However, if you really want a science party, you’ll have to harness the sun. To do that, you need one end of the solar microscope to sit outside in bright light while the other end points into a darkened room.
One common method of achieving this effect relies on an open window. Place the solar microscope so the end with the condenser lens can catch the sunlight while the end with the projection lens points into your dark room. To completely separate the lighted area from the darkened one, block the external rays with a sheet of opaque black cloth and some paint-safe tape.
Once you have mounted the solar microscope in the window, take the solar reflector you made earlier and check out the alligator clamps on the assembly’s open end. You can use these to attach the mirror to the condenser-lens end of the solar microscope. Adjust the angle of the mirror so it reflects sunlight through the lenses and microscope slide. It should project an image onto a white screen inside the darkened room. Once you obtain a bright image, you can adjust both the size of the image and its focus by changing the distance between the screen and the microscope lens.
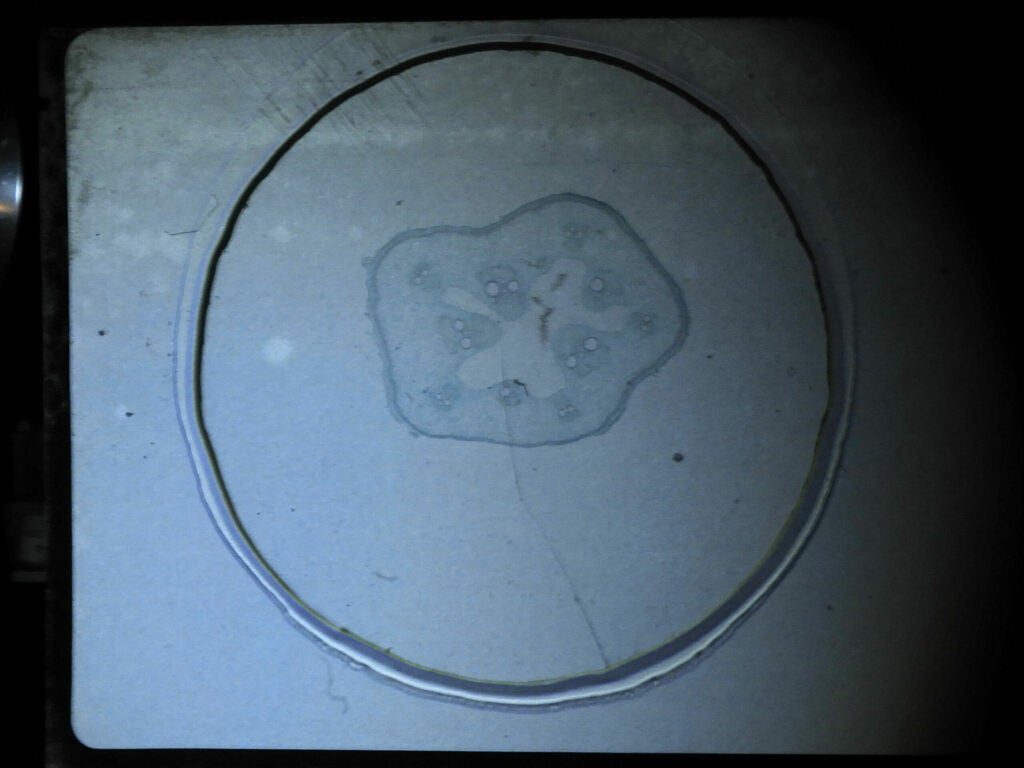
Small sample, big picture


